I love my big old Hasselblad with its solid heavy lenses, but I am also enamored of things small. I love to go out into the world to photograph bearing the minimum equipment to get the job done. And I enjoy the challenge of pushing that equipment to the limit. Thus I am totally enamored of my Ricoh GRII, an amazing little camera that easily slips into my pocket but takes remarkably clear photographs. It costs about $450 at B&H — less than many lenses for my Canon 5D mk III. https://www.bhphotovideo.com/c/product/1159252-REG/ricoh_175843_gr_ii_digital_camera.html .

Ricoh GRII
I will write a lot more about this camera in a later blog but today I want to show you how I get the best images possible from the smallest camera.
Here is portrait I made with the Ricoh earlier this week of my Porters Landing neighbor Lindsay Sterling.

Lindsay at the Steinway
To capture the images, I affixed the Ricoh GW-3 Wide Angle lens that converts the fixed lens in the camera to 21mm. (That add costs only $149 at B&H)
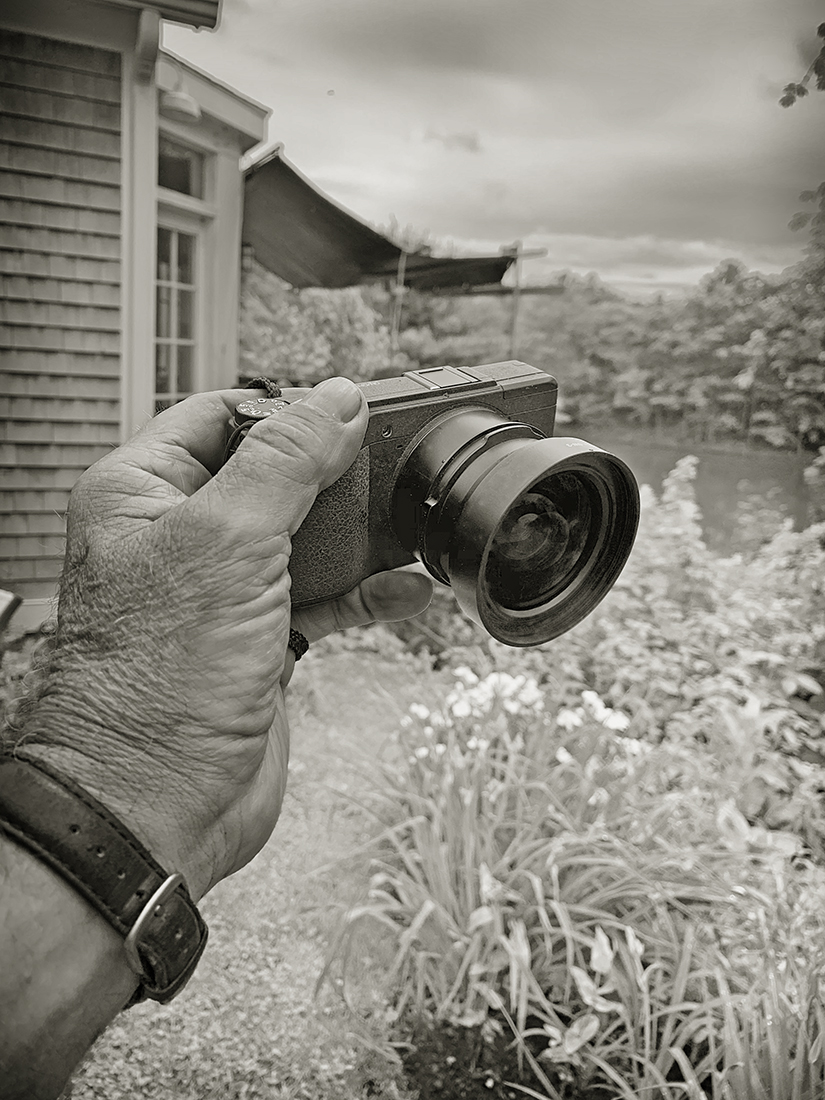
Ricoh GRII with GW-3 Wide Angle lens
In order to get the shot while standing behind Lindsay’s kitchen counter I had to hold the camera high over my head, looking down. That is why you are able to see so much of the top of the piano in the final image. I wanted to bet everything in from the top of the windows to the closest leg of the piano. But with such a wide lens pointing downward there was going to be a lot of distortion. Here is the original, unprocessed shot.

Lindsay’s image right out of the camera
The process from this point all takes place in PhotoShop. Here are the steps that got me to the final image you see above:
I get rid of noise using Neat Image. https://ni.neatvideo.com/overview/what-is-it . I have had great success with this product, much better than the noise reduction within PhotoShop.
I apply the PhotoShop filter Lens Correction. I use the Custom mode which is much more precise but this only makes the distortion less pronounced. It still needs more work.
I then apply the PhotoShop filter Adaptive Wide Angle. Once you learn how to use this filter it is magical. It will straighten out lines and give you true horizontal and vertical orientations of walls, windows, doors or anything else.
I then convert to a monochrome. There are at least two ways to do this that I use — either the Filter Camera Raw or by using the Nik Software’s plug-in Silver Efex Pro 2. https://nikcollection.dxo.com/silver-efex-pro . Either technique will let you assign specific values in the translation from color to monochrome. I may write a blog in the future on the differences between the two methods. But Silver Efex also lets you tone your image in countless ways.
I then flatten the image and go to Image/Adjustments/Curves to make sure that my image captures “almost” the full dynamic range from black to white, just making sure there is a tiny bit of texture in both the darkest and lightest part of the image. I also use Image/Adjustments/ShadowHighlight to tweak the perceived dynamic range.
All that may sound like a lot of work but having used this workflow for a few years it is now second nature. The result is the ability to get the best image I can from my little camera. The only other way I know to conquer the problem in this photo would have been to use a tilt shift lens (that might have worked) or a view camera. Neither one would fit in my pocket, however.